frameworking
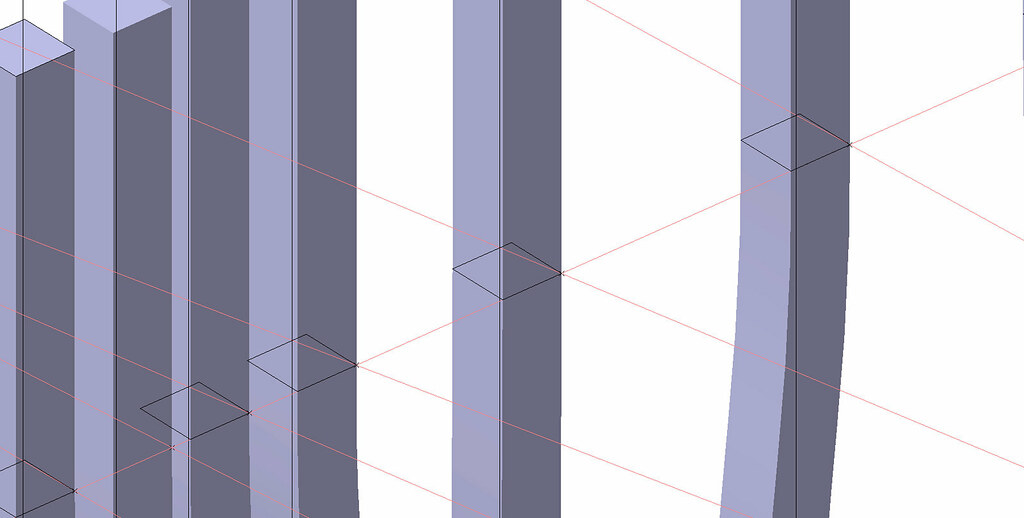
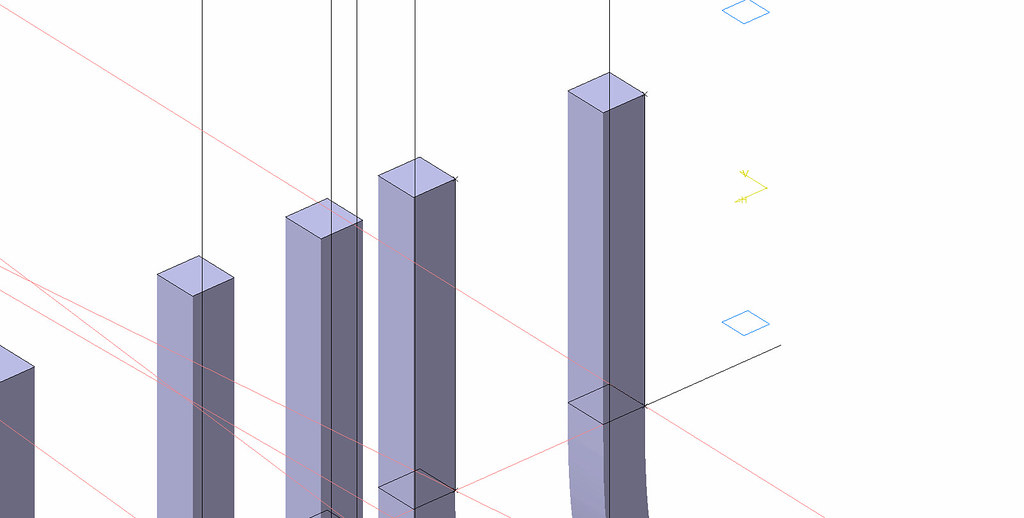
The framework was setup using a combination of projected curves and global parameters. Projected curves with points at the intersections were used to create planes that were the basis for sketches. The global parameters were used to modulate dimensional thickness and heights of modulation.
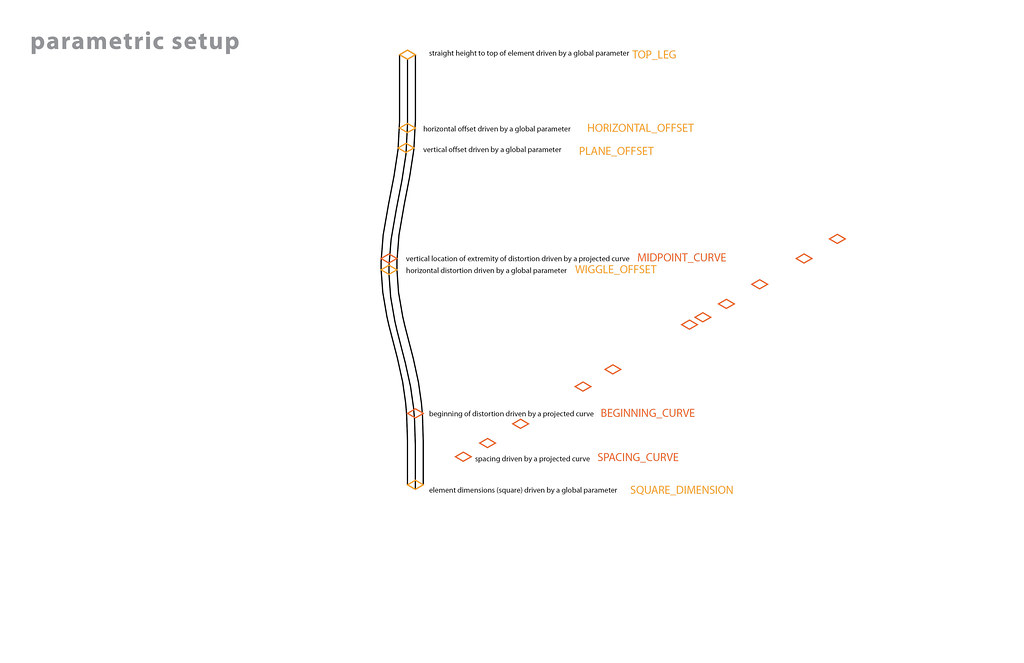

[Color was used to visually keep the planes straight while generating the multi-section solids that form the screen.]

[Planes were attached directly to the points, or, in some cases attached to parametrically-driven lines out from the points of intersection.]

prototyping
In order to three-dimensionally print the members, four variations were exported to Rhino separately and then compiled into a cut file.


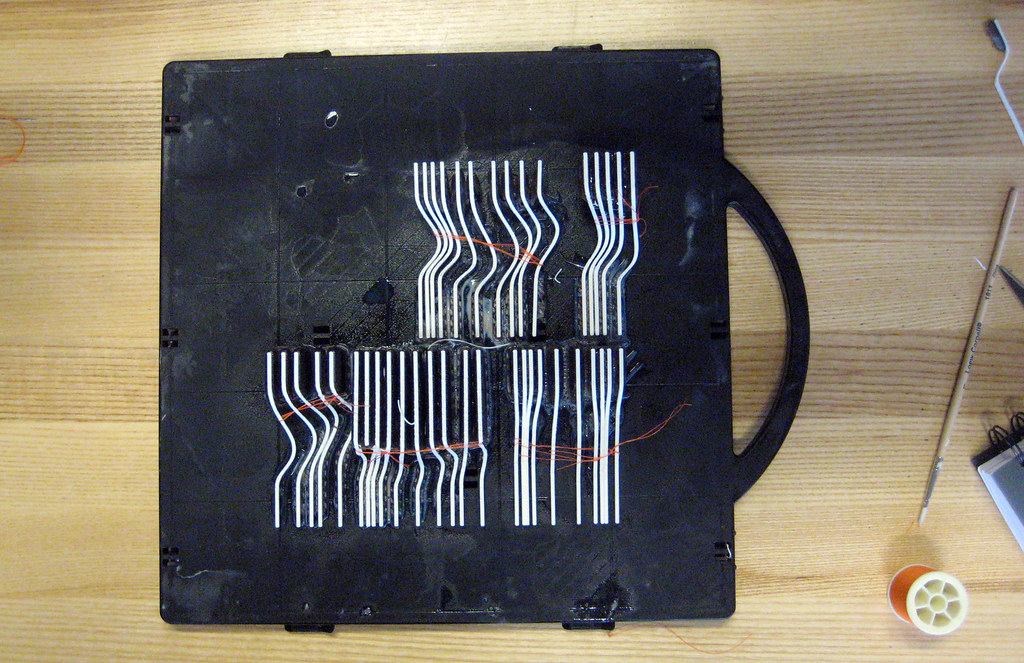
[With the design intent of lasercutting a base, the members were submitted as separate pieces. In order to not clog the pipe for the acid bath the members were bundled together using string and tape.]

[Neither of the binding solutions worked to keep the pieces together. One bundle was removed from the acid bath adhered together.]
outputing
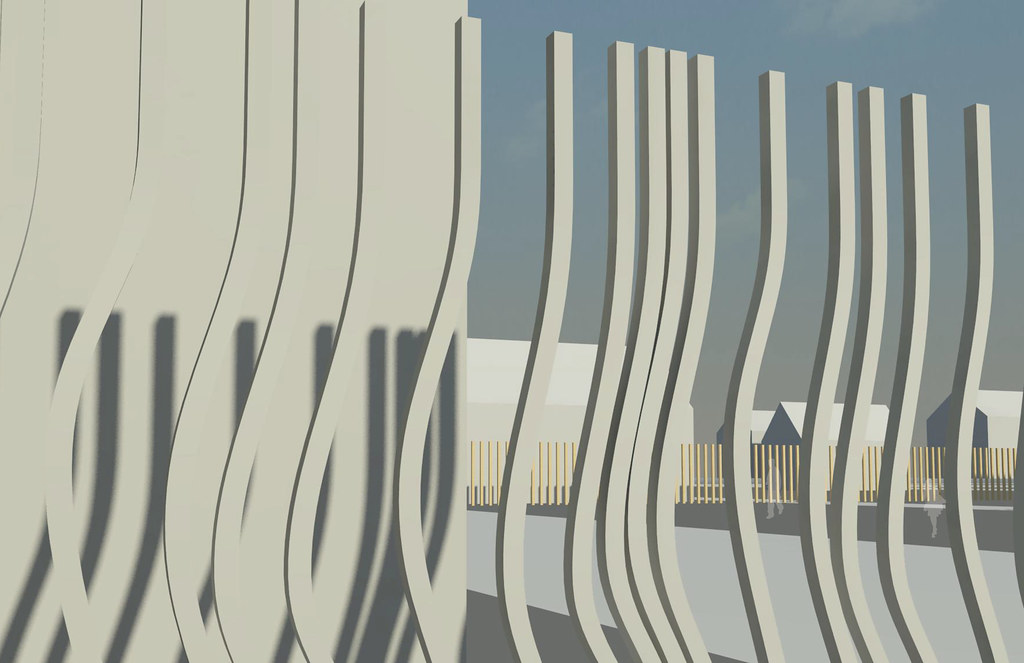
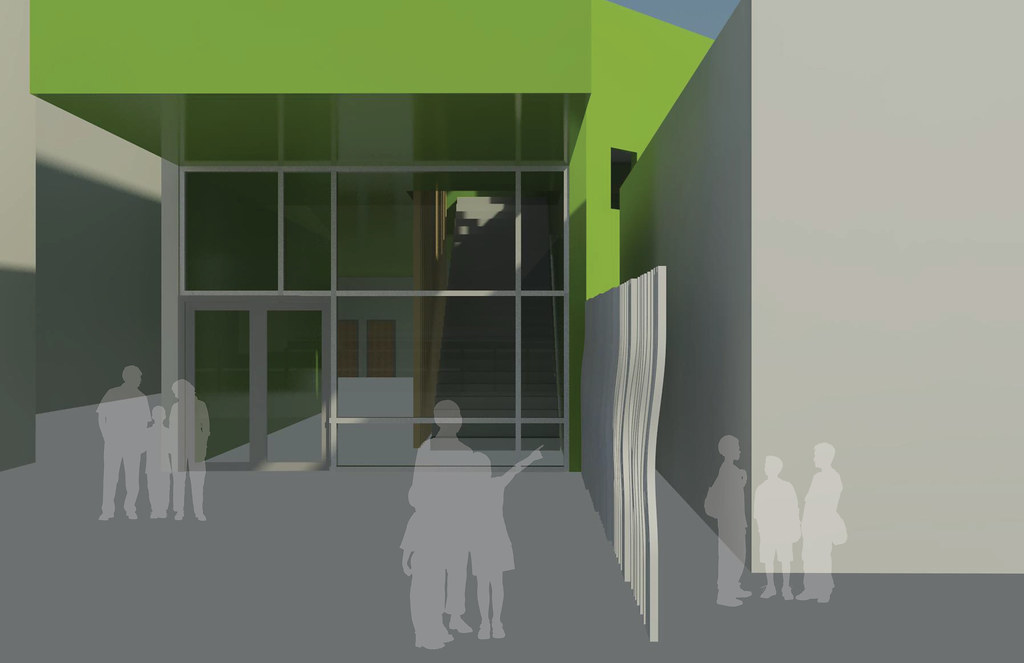
In order to render views of the screen and to show it in the context of my studio project, the digital project file was exported to Rhino as a .igs and then imported into Revit as a .sat file.


documenting
Using the drafting tools in digital project, multiple drawings of the part were generated by setting up a sheet file, updating the model, then refreshing the sheet, and then printing to pdf.
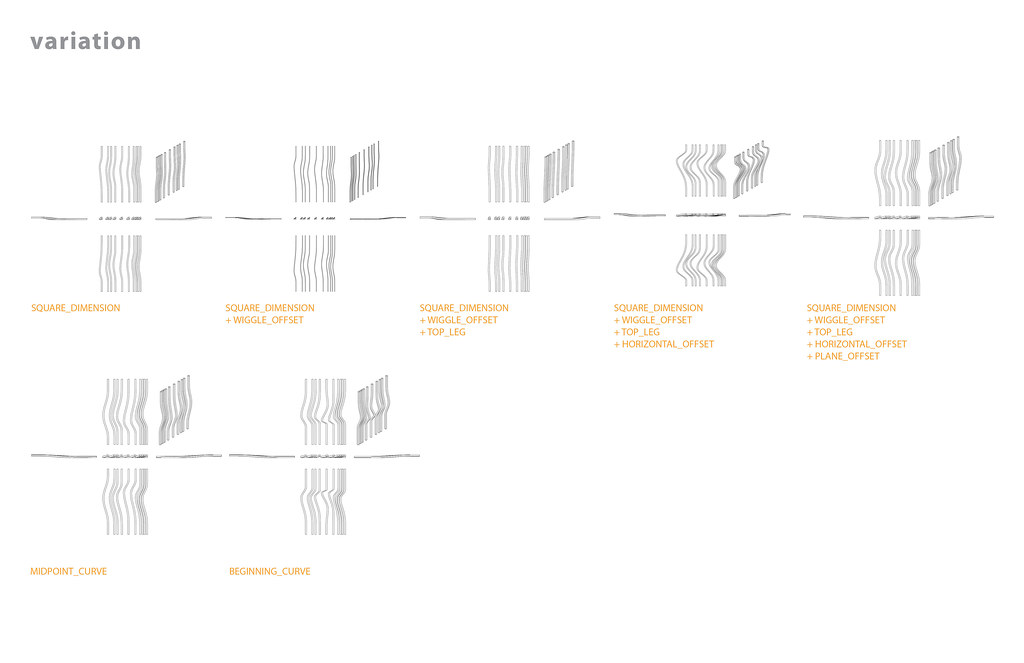
[Multiple iterations of the parametric flexing were edited in Illustrator to change the default lineweight from 1.97pt to .5pt.]

[A still image capture in Digital Project was combined into an animated gif in photoshop to show the active nature of the parametric flexibility. Approximately two-thirds through the movie, the part is stretched too far and the geometry cannot be created.]